Showing posts with label SCA. Show all posts

Sunday, September 27, 2015

Coronation

Currently, Jehan and I are headed back from Coronation in New York. It was a lot of fun, but very cold (Jehan and I tent camped the event). I was very proud of myself for finishing a women's doublet where I was able to get some advice on how to refit it. I'll post pictures of that project later. 
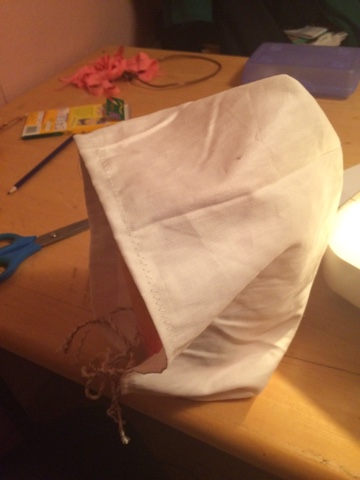
I'm preparing for FF&F for a new class I'm teaching; the topic is what can I make out of a yard of fabric. So far, I have 2 hats made, a Viking and an Elizabethan coif. When j get everything put together my plan is to put the class up here. 

Viking cap

Elizabethan coif 

Lake at Coronation 

I've teamed up with Mistress Cori to work on Kingdom 12th night, which we worked on this weekend, which I am very excited about. Projects are running around and I'm getting things accomplished in a manner that I am happy about
Till later!

Wednesday, September 4, 2013

Never stopping, never ending...

After Pennsic, I realized how many projects I have started and not anywhere close to finishing. So to save my sanity, and my space, I'm cleaning my house, organizing art supplies and FINISHING projects that I randomly have started. So far, I have 1)scroll for largess 2) red beaded snood 3)embroidered panels to make into silent auction pin pillows 3)green cotton garters 4)black fingerless gloves for Lady Rowan 5)beard hat for my friend Salt. If I finish these projects before the new year, I will be very happy. I think next year I'm going to put myself on a scheduled plan and that is all I can work on. Unfortunately I am very scattered brained, and I love shiny new ideas. When one pops in my head I end up starting and not finishing...which is NOT a good thing.

In other news, my landlord has decided to sell my apartment. While that means that we will eventually have new building owners, we will not have to find a new place to live until at least March. With that in mind, I'm going to have to work really hard to make sure these projects are finished so they can have new homes so I don't have to transport them to a new home if it comes to that. Still can't wait until Jehan and I can own our own place and I can allow the creative muses to flow....

until then,
An

Tuesday, August 20, 2013

And I have video evidence...


Well, here is the video most people have been waiting for...our wedding video. At about the 12 min mark, our fencing match starts

hope you enjoy!
~An

Wednesday, August 7, 2013

Here comes the bride...part 2

Well, Pennsic has come and left us. I am sad this year that it is over with. I had a pretty relaxing time just doing 1 week this year, and got a nice sun tan in the process.

 We had a lovely wedding at Pennsic...approximately 20 people we in attendance. I was brought before Jehan through a sword arch, which consisted of members of our fencing community. Count Andreas was the head of the ceremony which made us both very happy. Andreas and his wife, Kallista, presented me with my AoA at their coronation, so they both will always have a special place in my heart. This is the dress that Mistress Maria and I have been working so hard on finishing for the day. I wanted to get a deep red snood done for the ceremony which didn't happen (its currently sitting on my lap), so I just used my black. I am planning on wearing this dress at our Shires 25th anniversary in March, with the completed hood, and the dress being completely done.


After the ceremony, Jehan and I entertained our guests with our first dance, and as you can tell it is definitly not the typical style. Jehan and I wanted something unique, and that is what we received. After our first dance, we were joined by several others in bouts with the bride and groom. I must say as fun as it was, it was sure interesting fighting in that dress. I don't recommend it, but I enjoyed myself that day.  Over all, my pennsic was enjoyable. I didn't attend any classes, and I did quite a bit of Marshaling (with actual marshals) during the week. I also worked in Mistress Maria's shop a little bit, and relaxed. Now its time to work on the future...future classes, future dresses, and just to the future

~Lady Antoinette deLorraine

Friday, June 28, 2013

Basic Knitting handout


This is a copy of the handout I use for the basic hand knitting I use for teaching at SCA classes. Please use it, and remember to cite you sources!

INTRODUCTION TO KNITTING

BASIC ABBREVIATIONS FOR KNITTING:
·         BO- bind off
·         Ch-chain; may be seen as Ch1, Ch2, etc.
·         Circ- circular
·         Co- cast on
·         Dc- double crochet
·         Dpn- double-pointed needle(s)
·         K-knit
·         K2tog- knit 2 (stitches) tog
·         M1R- make one right slanting; with the tip of the left hand needle inserted from back to front, lift the strand between the two needles onto the left hand needle; knit through the front loop to increase one stitch
·         M1 or M1L- make 1 left slanting; with the tip of the left hand needle inserted from front to back, lift the strand between the 2 needles onto the left hand needle; knit the strand through the back loop to increase one stitch
·         P- purl
·         P2tog- purl 2 (stitches) together
·         Pm- place marker
·         Rnd- round
·         Rs- right side
·         Ws- wrong side
·         Ssk- slip, slip, knit- slip the next 2 stitches to the right hand needle one at a time as if to knit; return them back to left hand needle one at a timeto their new orientation; knit them together through the back loops
·         St(s)- stitches
·         Tog- together
·         Yo- yarn over; bring yarn forward (to the purl position), then place it in position to work the next stitch. If the next stitch is to knit, bring yarn over the needle and knit; of next stitch is to be purled, bring yarn over the needle and then forward again to the purl position and purl.


I will make sure to add different pictures at a later time...


Pot holder/arm warmer pattern
Cast on 44 stitches. Knit until desired length. Bind off. With right side facing, sew side seam, beginning at cast on edge and ending 2 1/2 “ from bound-off edge, leaving a gap of approx 1 ½’ from thumbhole. Rejoin yarn and sew seams to end. Weave in all ends

Works Cited:
26 Punk Knits

Hope you enjoy, and keep on Knitting!
~An
Detached Buttonhole Embroidery Stitch

This is a copy of the handout I use for the detached buttonhole stitch I use for teaching at Embroidery classes. Please use it, and remember to cite you sources!


DETACHED BUTTONHOLE STITCH
·         Because this stitch is not attached to anything, it can be stuffed to give a raised appearance, or be totally cut from the fabric to form the basis of stumpwork
·         The buttonhole stitch has several common variations (blanket stitch, eyelet stitch, and the detached buttonhole)
·         A filling stitch with several variations (closed buttonhole, crossed buttonhole, Buttonhole shading <top knotted buttonhole stitch, German knotted buttonhole stitch, tailors buttonhole stitch, Armenian edging stitch>)

      
HOW TO COMPLETE
WHAT IT SHOULD LOOK LIKE
I will make sure to update this as I collect more information, and with better pictures

BIBLIOGRAPHY 
¨       Exploring Elizabethan Embroidery< Dorothy Clarke , Stephanie Powell


Saturday, November 24, 2012

How to build a card loom

Here it is: the directions to building a simple card loom. This pattern should only on average cost about $17-$20 a loom. In total we made 9. We were able to get the wood cut at the hardware store, which made life a bit easier. If you have any questions, please do not hesitate to ask. If I can't answer it, then I'll hunt it down for you. I would love to find out if anyone else had the same results as us.


·         1    2ft. 1x6
·         2    6in 4x2 (can be created by gluing 2    2x2)
o   If using 2x2’s wood glue and c-clamps
·         4    5/16-18x41/2 carriage bolts
·         4   5/16-18 wing nuts
·         4   felt pads for furniture (optional)
·          Scrap leather/stiff fabric (non-abrasive) to pad loom
·         5/16 drill bit
·         21/64 drill bit
·         Hammer

1.       Sand boards
2.       If gluing 2x2’s start gluing process
3.       Cut and attach leather

4.       Drill holes through wooden blocks and main board (when dry)
a.       Use 5/16th for main board
b.      Use 21/64 for top blocks


5.       Add bolts and wing nuts 
6.       Add felt pads to bottom bolts
*if making multiples, mark sides for they are individualized, and depending on your drillers skills


 Sorry if the Pictures don't line up straight: I tried to get them under each set of directions. Enjoy!

~An